HOWTO: Run Ubuntu 8.10 On the Asus Eee PC 1000
For many years I’ve been wanting a laptop but I’ve never been able to justify spending $2000 for one, so the emergence of the “netbook” category — lightweight laptops with limited power for a lower price — has been welcome.
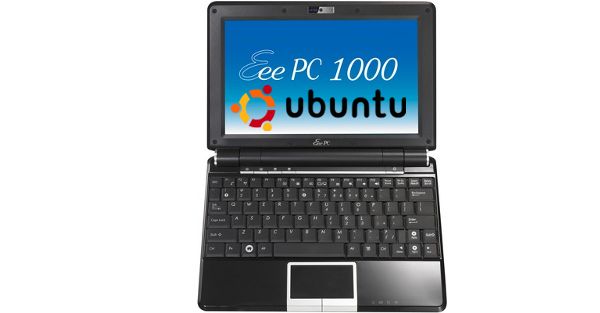
After evaluating the current netbook options I finally pulled the trigger and bought myself an Asus Eee PC 1000, on which I’m typing this entry. It’s a little larger than the original crop of netbooks, which I liked because it meant it came with a near-full-size keyboard. I touch type so super-cramped keyboards are a pain.
The Eee 1000 comes preloaded with a special customized version of Xandros Linux, but since I run Ubuntu at home I wanted to do the same on my Eee. This turned out to be a little more complicated than I’d hoped it would be, since the bundled Xandros has been tuned by Asus to work with the Eee’s hardware, and generic Ubuntu has not. Now that I’ve got these issues resolved, I thought I’d write up how I did it in case it might help others who want to do the same thing.
The current version of Ubuntu when this was written was Ubuntu 8.10, “Intrepid Ibex“. Some or all of the steps below may be different if you use a different Ubuntu release. I’m told the process with Ubuntu 8.04 (“Hardy Heron”) is pretty much the same, but I can’t speak to that from experience.
Warning: geekery follows. If you’re not into that sort of thing, here is a video of a cat riding a Roomba.
Start with stock Ubuntu, not Ubuntu Eee
There is a special modified version of Ubuntu out there called Ubuntu Eee (update: since I wrote this, Ubuntu Eee’s name has changed to “Easy Peasy“, but it’s the same product) that claims to be a one-step solution to running Ubuntu on your Eee. My advice: skip it. I started this process by wiping the Eee’s disk and installing Ubuntu Eee; I then spent several days trying to fix a range of problems, mostly related to connecting wireless networks, without success.
Frustrated with this process, I wiped the disk again and replaced with the “stock” Ubuntu distribution rather than the “customized” Ubuntu Eee. Surprisingly, this proved to cause fewer headaches than Ubuntu Eee did. So my advice is to not even bother with Ubuntu Eee; whatever good points it brings to the table are outweighed by its problems.
The Eee doesn’t come with an optical drive, so you’ll need to get the Ubuntu base files onto a USB stick in order to install it. There’s a tool called UNetBootin that makes this stupid easy. If you have an ISO image of the Ubuntu CD, it can take the files from there; if you don’t, it can download them for you automatically. Either way you end up with a USB stick you can boot and install Ubuntu from. (Note: you’ll need a stick with at least 1GB of free space.)
Once you’ve prepared your USB stick, just plug it into the Eee and reboot. When you see the Asus splash screen, start hitting Esc until you get a menu of available disks to boot from. One of these will be your USB stick. Select that one and you’ll see the familiar Ubuntu loading screens. From there, just follow the menu prompts to reformat your drives and install Ubuntu.
One note on installation — the sales literature for the Eee 1000 say it comes with a 40GB solid-state disk, but this is, strictly speaking, not true; it comes with a fixed 8GB solid state disk, and a 32GB flash memory card. In practical terms this is no big deal since you do in fact have 40GB of usable storage, but for maximum performance you want to ensure you install the OS onto the 8GB SSD rather than the flash card. To simplify keeping track of what files went where, I set the mount point for the 8GB SSD (/dev/sda1) as / and the mount point for the flash card (/dev/sdb1) as /home. This lets me put all my media files on the flash card just by dumping them in my home directory, while installed applications and the base OS go on the SSD.
Install customized kernel
Once you’ve got Ubuntu installed, you’ll find it runs OK but that some of the Eee’s hardware components, like the wifi radio, don’t work, because the stock Ubuntu kernel doesn’t include support for them.
Thankfully, a helpful fellow named Adam McDaniel has taken on maintaining a version of the Ubuntu kernel that does include support for these devices. So your next step will be to replace your stock kernel with Adam’s souped-up version.
This may sound like a frighteningly technical task but it’s actually really easy — and it leverages the APT packaging system, so it’s easy to undo if you should ever want to, and updates will automatically flow to your system as they are released. Just follow Adam’s clearly written instructions for your Ubuntu release (Intrepid instructions, Hardy instructions) and you’ll be all set.
Note: once you’ve got the kernel installed you may find your webcam and Bluetooth radio still don’t work. This is because some Eees leave the factory with these devices disabled in the BIOS. Switch them on in the BIOS menu and you’ll be good to go.
Disable IPv6
At this point you’ll notice that your Eee is able to reliably connect to some, but not all, wireless access points. Why should this be, you will wonder.
The answer is that Ubuntu sets up your wireless radio to use IPv6 by default. The problem is that lots of access points in places like airports and coffee shops — you know, the sorts of places that were the reasons you bought the damn laptop in the first place — are IPv4 only.
Defaulting to IPv6 is sensible from a future-proofing perspective, but it means that you will have problems connecting to access points that are IPv4 only. Don’t ask me why, I have no idea, it just appears to be The Way Things Are. (I have had the same problem on some new Windows laptops that are configured to default to IPv6, so no bitching about Linux, please.)
Follow the instructions here to turn off IPv6 on your Eee. There are other methods described on that page, but these are the ones that worked for me.
Install Eee Control Panel
The default Linux that comes with the Eee has a bunch of nifty options to let you do things like throttle down the CPU to conserve battery power. Unfortunately, stock Ubuntu doesn’t come with anything like that, so we need an add-on to bring those features back.
I use Grigori Goronzy’s eee-control-tray for this, as it’s easy to install and provides an easy-to-use tray menu for these functions. Here’s how to install eee-control-tray.
And you’re done!
There’s other customizations you can make (like, for example, replacing Ubuntu’s anemic network manager with WICD to make it easier to browse and log on to local wireless networks), but the steps above should get all the core hardware working for you in Ubuntu.
Enjoy your Eee!

Comments
Steve
December 26, 2008
4:51 am
I recently received an Asus Eee PC 1000 for Christmas, love it. I followed the setup you outlined to install Ubuntu and the custom kernel. I also enabled all devices in the BIOS and disabled IPv6 as well. So far so good. I have not installed the Eee Control Panel or Wicd as yet. When I do I’ll provide my feedback.
Thanks
Steve
Steve
December 26, 2008
12:00 pm
UPDATE:
I have followed the walkthrough completely and found that all hardware works, and the Eee Control Panel and Wicd works too. I feel that Wicd works better than nm-applet as if you disable/enable wifi in Eee Control Panel you have to manually restart the applet versus simply hitting the refresh button in Wicd.
Thanks for the info and the walkthrough
Steve
Sean
December 28, 2008
5:50 pm
This was really very helpful. Worked perfectly. Thank you.
Jake Behrens
December 29, 2008
12:00 am
Did the ethernet work out of the box for you? I have the 1000 and installed 8.10 and I can’t seem to get the ethernet to work. Any ideas? (and yes, it’s enabled in the BIOS)
Jake Behrens
December 30, 2008
4:38 pm
UPDATE:
I guess the ethernet problem was a fluke, I got it up and running and your how to was awesome! Thanks!!
surfstyle
January 3, 2009
8:51 am
there are so great tips… thanks, it was so easy install ubuntu this time for me
T Phizackerley
January 11, 2009
7:28 pm
Many thanks this has been very easy and worked like a charm. I actually prefered the Xandros shipped with my ee pc. (That is once I got the full desktop enabled and set up). However ubuntu allows me to run a firewall so I’m sticking with it. Excellent many thanks
jeremy
January 15, 2009
11:16 pm
it all works perfectly, but what about the ubuntu updates? the first 2 times i ran them my wireless died out. is there some way to run updates and leave the specific settings the same without overriding the EEE settings?
Moth
January 17, 2009
5:07 pm
First off, what an excellent and thorough how-to (applause). One problem i am having is getting my Ethernet to grab its dhcp, it tries and tries, then disconnects. Someone above said it was some type of fluke. Did you do anything to fix it? What specifically was it doing wrong?
surfstyle
January 26, 2009
12:06 am
I used your guide to configure my asus 1000 but now the wireless isn’t functioning (cannot go on from “obtaining an ip”). I don’t know what is this… i suppose i’m using ipv4
Bill
February 6, 2009
6:12 pm
Great post… very helpful. One small thing; where you say to press F2 to get to the boot menu in grub, you have to press the escape key instead. Other than that, everything went exactly as described.
Bill
February 13, 2009
10:44 pm
I used the “lean” kernel for ubuntu 8.10 at first and had trouble connecting to some wireless access points. I went back to make sure that ipv6 was not running as you suggested, and found I could not turn it off. I used all the methods on the link that you provided without success. I went back and used the other kernel (not lean) and was able to turn off the ipv6. I have not been back to the airport where I was having trouble connecting to the wireless access points yet, but I am hopeful that this will clear things up. The main reason listed for using the lean kernel was boot time… I didn’t notice any significant difference in boot time for me between the two.
Stephen
February 28, 2009
1:28 pm
Thanks! I received my eee PC 1000HE yesterday and your instructions worked great. Actually, the stock Ubuntu recogized my wireless network right off the bat. The control tray didn’t work though, probably b/c this uses the new Atom cpu.
One strange thing on this device is that it saw the USB stick as a HDD in the BIOS, so I had to move it up above the real HDD in the device list and then it appeared in the boot priority menu.
billy
March 22, 2009
7:14 pm
linux noob here; how do i do this?
“To simplify keeping track of what files went where, I set the mount point for the 8GB SSD (/dev/sda1) as / and the mount point for the flash card (/dev/sdb1) as /home.”
Jason Lefkowitz
March 22, 2009
8:02 pm
Billy —
you’d do it when you’re running the disk partitioner, during the process of installing Ubuntu from your flash drive. The partitioner will show you the two disks and ask you to choose a “mount point” for each from a drop-down menu. Just pick “/” as the mount point for the smaller one (labeled “/dev/sda1”) and “/home” as the mount point for the larger one (labeled “/dev/sdb1”) and you’re all set.
Scott Lenger
March 28, 2009
11:34 am
Nice tutorial. I tried the lean Intrepid kernal and everything was great (bluetooth, wifi, webcam, etc) until I closed the lid and put it in standby…from which it never woke up 🙁
Do you know if this issue is limited to Intrepid-eeepc-lean, or is with Ubuntu/eeePC in general?
Jason Lefkowitz
March 28, 2009
1:10 pm
My guess would be it’s the lean kernel, because I used the regular Intrepid kernel and my Eee wakes up fine.
Jim
April 10, 2009
9:07 pm
Hi,
I’m a long time user of linux with a noob grasp of the workings. I’m much more comfortable with a GUI than a term window for installing apps.
I got an ASUS eee PC 1000 about 6 wks ago. I really like the machine but I’m frustrated with the restrictions imposed by the pre-installed Xandros. I saw the video of what it can really do and got all excited about loading Ubuntu.
I’m trying to install the stock Ubuntu v8.1.
While checking the partitions I notice 5 partitions:
sda1 ext2 3290 MB,
sda2 ext3 4762 MB,
sda3 no type listed 8 MB,
sda4 no type listed 8 MB,
sdb1 ext3 32275 MB
I understand sda is the ssd and sdb is the flash drive.
I’m thinking I can make sda all one partition and sdb another.?
Or should I leave the partitions alone and install / on sda1 and /home on sda2 or sdb1? (In which case what happens with sda2?)
What is up with sda3 and 4? Could these be the journaling partitions?
This is my first adventure with ssid memory.
Thanks for your help.
Joe
April 29, 2009
11:39 am
Great write-up! Have any strides been made on Jaunty (Ubuntu 9.04)? I tried their Netbook Remix and found similar situation as with the “ubuntu eee / easy peasy”, where it solves 5 problems but creates 12 more. I checked out Adam’s site at Array.org and it doesnt look like anything has been released for fine-tuning 9.04 yet.
In the “Stock” 9.04 install, the main issues trace back to ACPI power management for the eee 1000h: System will not resume from standby, and battery life is low, probably due to lack of CPU throttling and HD spin-down.
Jason Lefkowitz
April 30, 2009
9:40 am
Joe —
I’m working on a similar writeup for Jaunty right now. Hopefully I’ll have answers for the various kinks over the next couple days.
The good news is that (at least in my experience) the Netbook Remix version of Jaunty works well — at least on the 1000 — right out of the box. Nearly everything “just works”, resuming from standby is fast and reliable, and the various special keys on the keyboard all work. Unfortunately the kernel architecture for IPv6 has changed since Intrepid, so it’s not nearly as easy to disable as it used to be.
I’m not sure that Adam is going to be doing a custom kernel for 9.04, given how many strides the standard kernel has made in netbook support. Best place to check is the Eeeuser forums — it’s the single best source for advice on running any flavor of Linux on any model Eee:
http://forum.eeeuser.com/