Rackspace Cloud Servers
This is just a quick note to tell you that I’ve been tinkering with Rackspace’s new-ish Cloud Servers offering. (I say “new-ish” because it appears to be the fruit of Rackspace’s acquisition of another hosting company, Slicehost.)
Cloud Servers is simply the slickest virtual private server (VPS) offering I’ve ever seen, offering a much nicer out-of-the-box experience than its main competitor, Amazon EC2.
Getting a new virtual server set up via Cloud Servers is literally as easy as 1-2-3:
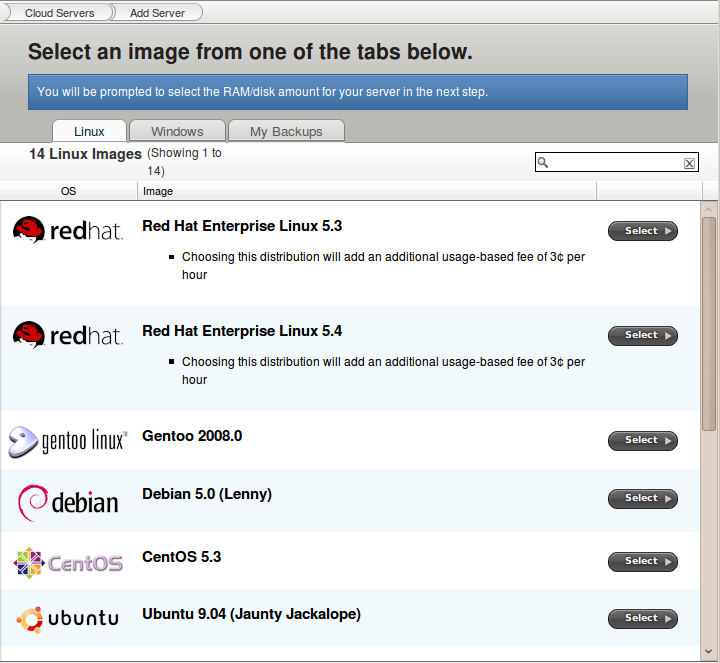
- Choose an operating system from one of 14 different Linux distributions (or six flavors of Windows Server, if you swing that way)
- Choose how much RAM and disk you want your server to have
- Wait for one or two minutes, then receive an email with the IP address and root password for your new VPS
That’s all there is to it. And you make the choices through the slick, easy-to-understand admin interface shown above, so there’s no need to plow through an arcane API or hunt down third-party tools just to spin up an instance. Hard to get much easier than that.
And the best part is that you don’t have to pay anything up front — there isn’t even a fixed monthly fee: you get charged an hourly rate (based on the RAM/disk configuration you chose) for each hour your VPS runs. So if your needs are light or temporary, you can pay for only what you need. And even if you leave it running 24/7, the amount the hourly fees add up to is quite competitive to the flat monthly fees other hosts charge for similar service. A Linux VPS with 512MB RAM and 20GB disk, for instance, nets out at around $20/month.
Of course, first impressions are only part of the story, so there’s still a possibility that the shine will come off Cloud Servers after I’ve lived with it for a while. But as of this writing, color me impressed.